These Frankenstein Candy Bar Cookies are a fun, spooky way to turn leftover Halloween candy into a delicious treat! Baked in vibrant shades of purple and green, these soft, chewy cookies are loaded with chopped candy bars—like Twix, Reese’s, and M&M’s—making each bite a flavorful mash-up. Perfect for Halloween parties, baking with the kids, or just clearing out extra sweets, these colorful cookies capture the playful, chaotic spirit of Frankenstein’s monster. With their eye-catching look and irresistible taste, they’re sure to be a hit!

These cookies were so fun to put together for Halloween! And now I know exactly what I'll be doing with our leftover Halloween candy each year!

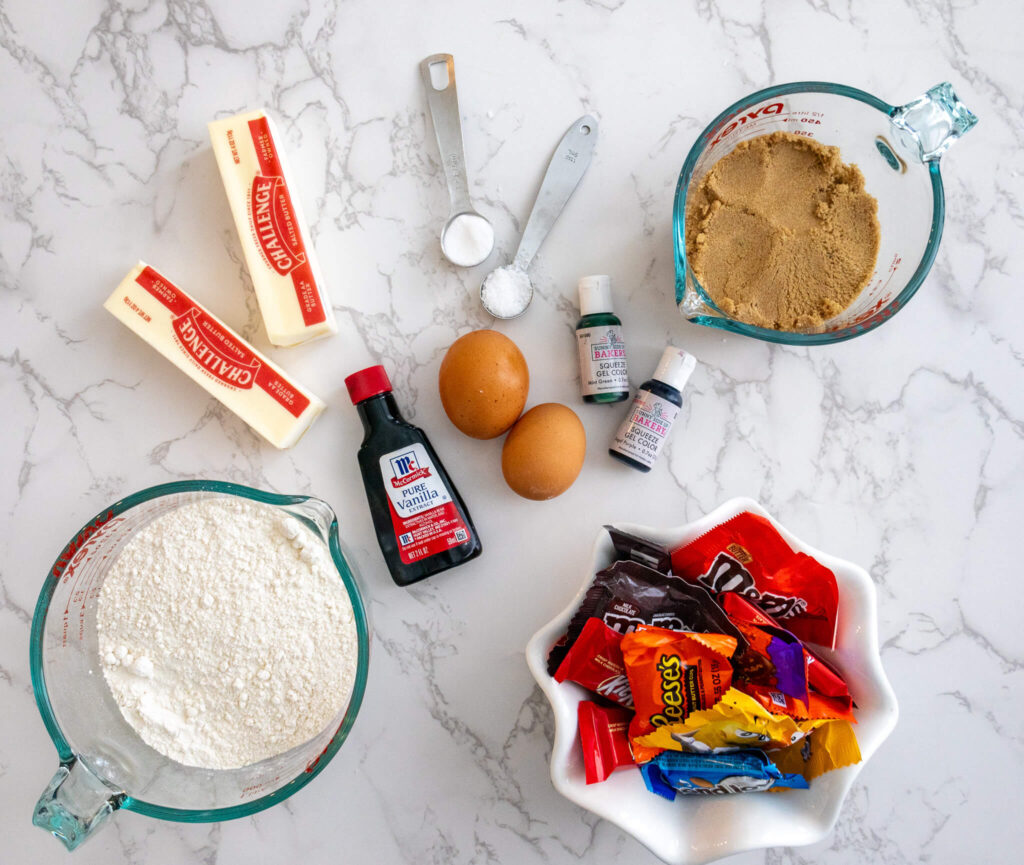
What ingredients are needed to prepare Frankenstein Candy Bar Cookies?
Please refer to the recipe card for precise measurements.
- salted butter
- brown sugar
- eggs
- vanilla extract
- gel food coloring - I used green and purple!
- baking soda
- salt
- all-purpose flour
- leftover Halloween candy! - chocolate bars and m&m's
- flaky sea salt
Any equipment necessary for preparing Frankenstein Candy Bar Cookies?
- cookie scoop
- baking sheets
- I highly recommend use of silicone baking sheets for this recipe, rather than parchment paper. The cookies don't stick at all with these!
- a round, plastic cookie cutter for getting that perfect round shape
- and if you're sending them away, I love these cookie bags for tidy packaging!
How to Prepare Frankenstein Candy Bar Cookies:
In a bowl, whisk the flour, baking soda, and salt together. Set aside.
Add the room temperature butter and brown sugar to the bowl of a stand mixer fitted with the paddle attachment (or use a hand mixer).
Beat on medium-high speed for 3 - 4 minutes. The sugar mixture should be light and fluffy and lighter in color when you are finished.
Adjust the speed to low and add in 1 egg.
Add 1 egg yolk and vanilla and beat until combined.
Add 3 drops of your desired color (if using) and beat until fully incorporated.
Gradually add in dry ingredients with the speed on low. Take caution not to over mix the batter and stop right when it looks combined.
Chop all of the candy into small bits (I like to refrigerate mine for a bit before this for clean chopping!). Fold ⅔ of the chopped candy into the batter. Reserve the remainder until the cookies are finished baking.
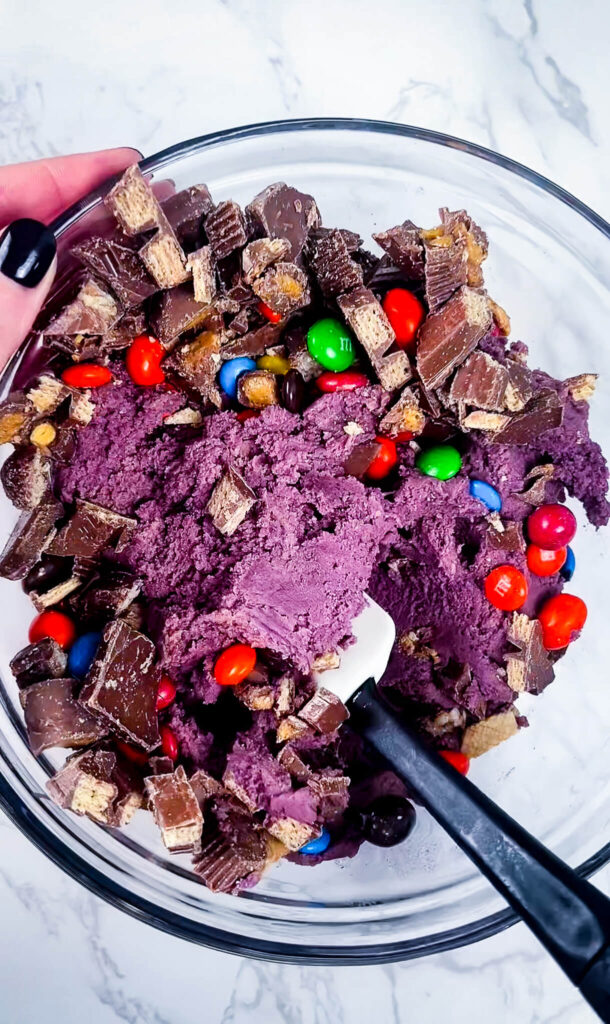
Using the cookie scoop, scoop out the batter into large balls of dough. Place them on the cookie sheet lined with the silicone mat. You can overcrowd the mat with cookie dough right at this second (you're going to throw them in the fridge), but have a second one handy for when it's time to bake.

Chill the cookie dough in the fridge for 2 hours.
1.5 hours in, preheat the oven to 350°.
When 2 hours are up, place 8 cookie dough balls spaced evenly apart on each silicone lined baking sheet and bake for 15 minutes.
After 15 minutes, remove the cookies from the fridge and place the cookie cutter over each cookie. Shake the cookie in a circular motion using the cookie cutter to help shape it evenly.
Sprinkle the cookies with flaky finishing salt and press larger pieces of candy into the tops of each cookie for a nice presentation and let cool completely on cooling racks.
Enjoy!

What type of candy do I need for Frankenstein Candy Bar Cookies?
I recommend chocolate for this recipe, don't use your leftover Twizzlers or Sour Patch kids for this one.

Storage:
Store these cookies in an airtight container at room temperature for up to 1 week.
Don't store cookies in the refrigerator as the chilled temps can dry them out and make them taste somewhat bland.
If you liked this recipe, you may also like these others on the blog!
- Chocolate Chip Banana Cookies
- Two Bite Brownies with Buttercream Icing
- No Churn Graham Cracker and Honey Ice Cream
I hope you loved this Frankenstein Candy Bar Cookie recipe! If you try it, be sure to leave a comment or tag me @atoastedcrumb on all socials! I’d love to see your work!

Frankenstein Candy Bar Cookies
Ingredients
- 1 cup salted butter
- 1.5 cups brown sugar
- 2 eggs (1 egg and 1 egg yolk)
- 2 teaspoon vanilla extract
- 3 drops gel food coloring, optional
- 1 teaspoon baking soda
- 1 teaspoon salt
- 2 ½ cups all-purpose flour
- 1.5 cups (10 - 15 pieces) leftover Halloween candy, chopped
- flaky sea salt for finishing
Instructions
- In a bowl, whisk the flour, baking soda, and salt together. Set aside.
- Add the room temperature butter and brown sugar to the bowl of a stand mixer fitted with the paddle attachment (or use a hand mixer).
- Beat on medium-high speed for 3 - 4 minutes. The sugar mixture should be light and fluffy and lighter in color when you are finished.
- Adjust the speed to low and add in 1 egg.
- Add 1 egg yolk and vanilla and beat until combined.
- Add 3 drops of your desired color (if using) and beat until fully incorporated.
- Gradually add in dry ingredients with the speed on low. Take caution not to over mix the batter and stop right when it looks combined.
- Chop all of the candy into small bits (I like to refrigerate mine for a bit before this for clean chopping!). Fold ⅔ of the chopped candy into the batter. Reserve the remainder until the cookies are finished baking.
- Using the cookie scoop, scoop out the batter into large balls of dough. Place them on the cookie sheet lined with the silicone mat. You can overcrowd the mat with cookie dough right at this second (you're going to throw them in the fridge), but have a second one handy for when it's time to bake.
- Chill the cookie dough in the fridge for 2 hours.
- hours in, preheat the oven to 350°.
- When 2 hours are up, place 8 cookie dough balls spaced evenly apart on each silicone lined baking sheet and bake for 15 minutes.
- After 15 minutes, remove the cookies from the fridge and place the cookie cutter over each cookie. Shake the cookie in a circular motion using the cookie cutter to help shape it evenly.
- Press larger pieces of candy into the tops of each cookie for a nice presentation and let cool completely on cooling racks.





Leave a Reply