These delicious, creamy dark chocolate and coconut popsicles are the perfect afternoon delight! They are simple to prepare and hit the spot when you're in need of something sweet! Made with simple, dairy free ingredients like coconut milk, shredded coconut, dairy free chocolate melts, these sweet little popsicles are just right!
If you know me well, you know I will eat almost anything that has both chocolate and coconut into it. It's just a flavor combination that sings to my heart. So these delicious chocolate and coconut pops were so fun to put together for this week's Feel Good Food release! They are crazy simple to make and take just a handful of ingredients. Let's get into it!
What ingredients are necessary to make the Dairy Free Chocolate Coconut Popsicles?
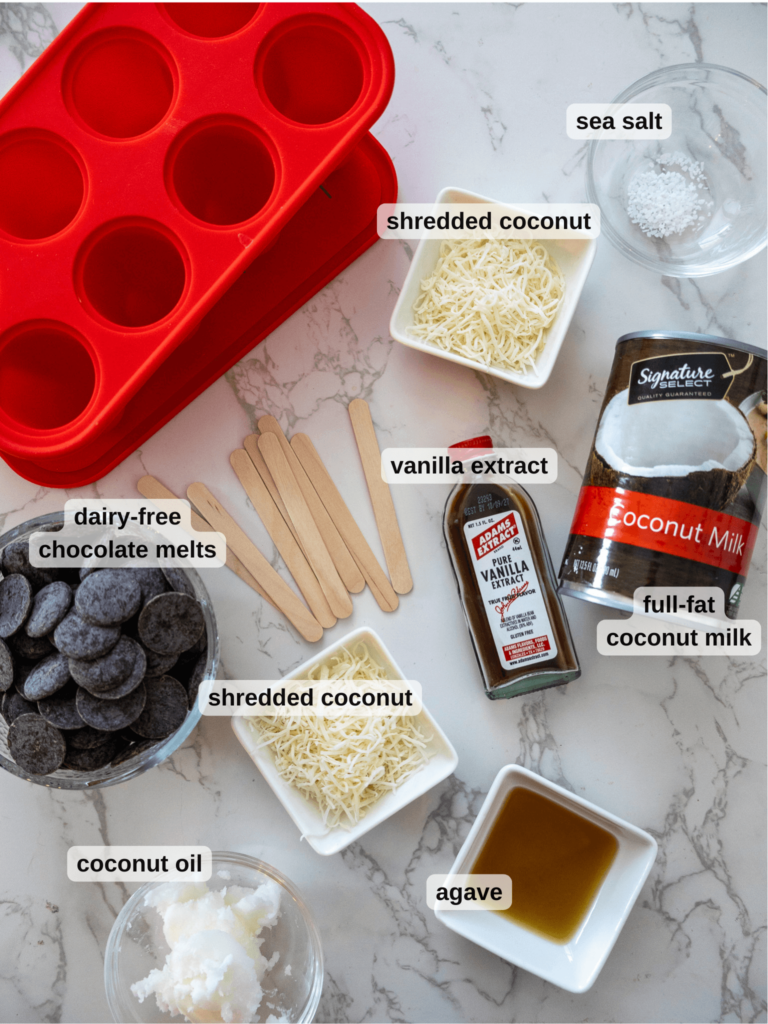
- 12 oz Dairy Free Dark Chocolate Candy Melts
- 1 13.5 oz Can of Full-Fat Coconut Milk (it needs to be full-fat for proper freezing)
- 1 teaspoon Vanilla Extract
- 4 tablespoon Shredded Coconut, divided
- 1 teaspoon Agave (or maple syrup)
- ½ teaspoon Sea Salt
- 2 tablespoon Coconut Oil
Is there any equipment necessary for preparing the Chocolate Coconut Popsicles?
For this recipe, because the popsicle mixture is quite thin, you will need a popsicle mold. I love mine from Amazon!
You will also need a large bowl and a whisk for preparing the popsicle mixture.
How to Prepare the Dairy Free Chocolate Coconut Popsicles?
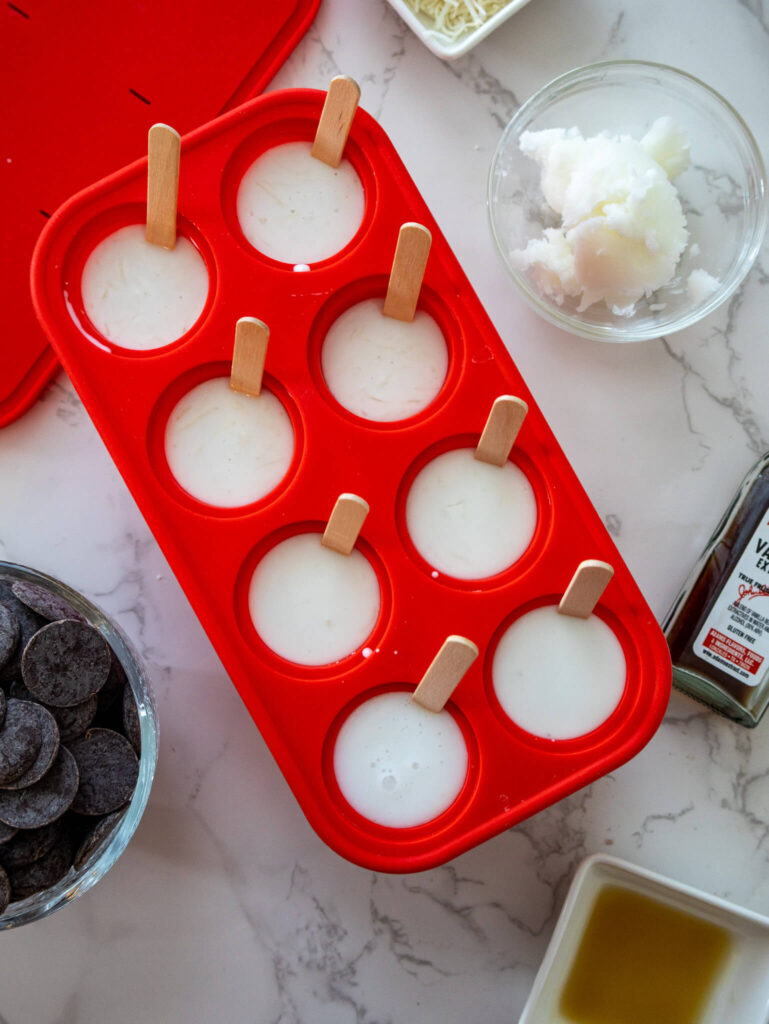
Prepare the Popsicle Mixture - Shake the can of coconut milk well and pour it into a large bowl. Add the vanilla, agave (or maple syrup), sea salt, and 2 tablespoon of shredded coconut.
Pour the Mixture into the Mold - Pour the popsicle mixture into the silicone mold. Fill the popsicle mold wells as close to the top as you can get. Choose if you'll be using the wooden popsicle sticks or the plastic holders (that often come with popsicle mold kits), stick them into each well and close the lid of the silicone mold.
Freeze and Patiently Wait - Freeze for at least 2 hours, mine usually take around 5 hours to be properly set.
Prepare the Chocolate - Add the chocolate melts and coconut oil to the large bowl you prepared the popsicle mixture in. Melt in 30 second intervals in the microwave whisking in between until completely melted. (Alternatively, you can place the bowl of water over a pot of steaming water on the stove. Use this "double boiler" to melt your chocolate more gently and avoid seizing.)
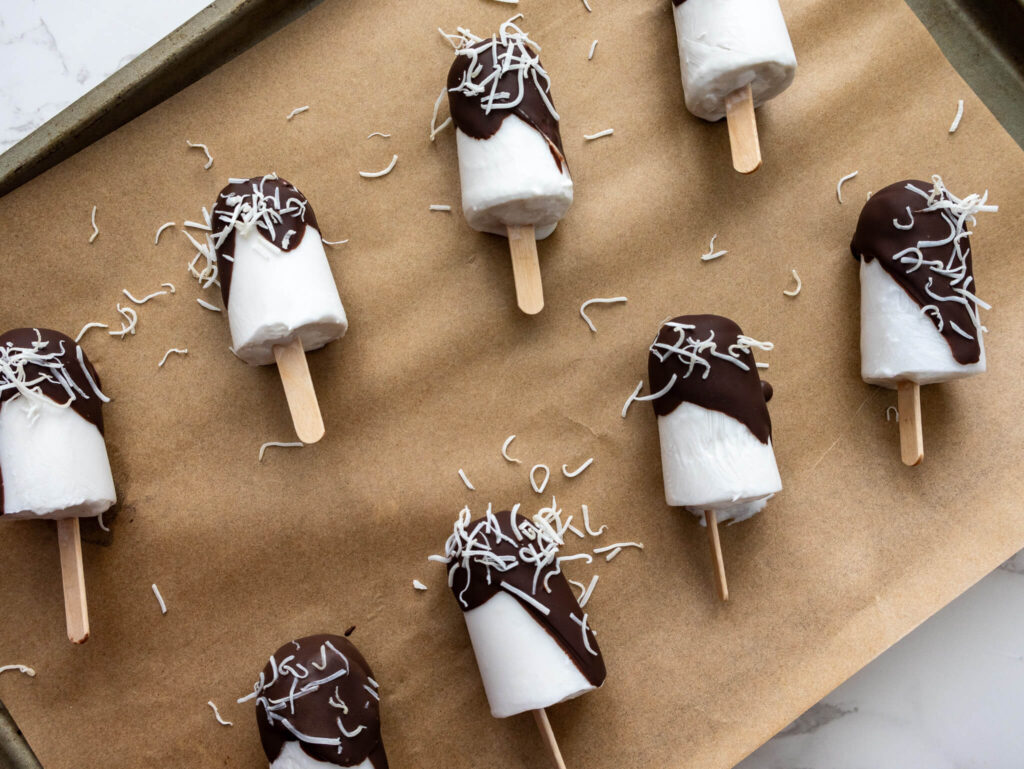
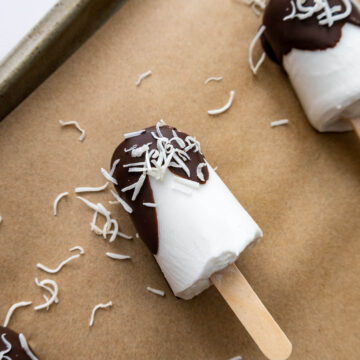
Dip! - Prepare a baking sheet with parchment paper. Run warm water over the outside of the silicone mold to release the popsicles and dip each into the melted chocolate. Sprinkle with coconut shreds immediately after dipping and place onto the lined baking sheet.
Storage:
Most popsicle molds come with popsicle storage bags that fit the mold popsicles perfectly! Use the bags to individually store each pop! If yours didn't come with bags, or you prefer not to bag them, just store wrapped in sheets of parchment in an airtight container and place them into the freezer.
More Fun Ways to Customize this Recipe:
- Almond Joy - Swap the vanilla extract for almond and add crushed almonds to the outside of of the chocolate. Now you've got Almond Joy Popsicles! (May just have to make this recipe again and try that myself!)
- White Chocolate Coconut - Use white chocolate melts instead of dark chocolate and add some blue sprinkles. Frozen, winter wonderland vibes!
- Add Raspberry - Coconut and raspberry is a combination I just love. (Full disclosure that was my plan with this recipe until I noticed I didn't have frozen raspberries.) Add chopped frozen raspberries into the wells of the popsicle mold before pouring in the coconut milk. (They need to be frozen or they'll move all around!) So tasty! (I think I smell a Valentine's Day recipe. 😉 )
I hope you enjoyed this Dairy Free Chocolate Coconut Popsicle recipe! If you try it, I'd love to hear your feedback or see your work! Leave a comment or share it and tag @atoastedcrumb on all socials!
Dairy Free Chocolate Coconut Popsicles
Ingredients
- 12 oz Dairy Free Dark Chocolate Candy Melts
- 1 Can Full-Fat Coconut Milk (it needs to be full-fat for proper freezing)
- 1 teaspoon Vanilla Extract
- 4 tablespoon Shredded Coconut, divided
- 1 teaspoon Agave (or maple syrup)
- ½ teaspoon Sea Salt
- 2 tablespoon Coconut Oil
Instructions
- Shake the can of coconut milk well and pour it into a large bowl. Add the vanilla, agave (or maple syrup), sea salt, and 2 tablespoon of shredded coconut.
- Pour the popsicle mixture into the silicone mold. Fill the popsicle mold wells as close to the top as you can get. Choose if you'll be using the wooden popsicle sticks or the plastic holders (that often come with popsicle mold kits), stick them into each well and close the lid of the silicone mold.
- Freeze for at least 3 hours, mine usually take around 5 hours to be properly set.
- Add the chocolate melts and coconut oil to the large bowl you prepared the popsicle mixture in. Melt in 30 second intervals in the microwave whisking in between until completely melted. (Alternatively, you can place the bowl of water over a pot of steaming water on the stove. Use this u0022double boileru0022 to melt your chocolate more gently and avoid seizing.)
- Prepare a baking sheet with parchment paper. Run warm water over the outside of the silicone mold to release the popsicles and dip each into the melted chocolate.
- Sprinkle with coconut shreds immediately after dipping and place onto the lined baking sheet.
- If necessary (if your chocolate isn't u0022quick setu0022), freeze for 5 more minutes and enjoy!
[…] Dairy Free Chocolate Coconut Popsicles […]